Walk cycle (Character in various walk cycle modes)
Basic body mechanics (Character displaying various activities)
Monologue (Character lip-sync)
INSTRUCTION
Exercise: Bouncing Ball & Acting Series
(W1 - W3) Ex 1: Bouncing Ball Series
Bouncing Ball Animation Series (Version 1)
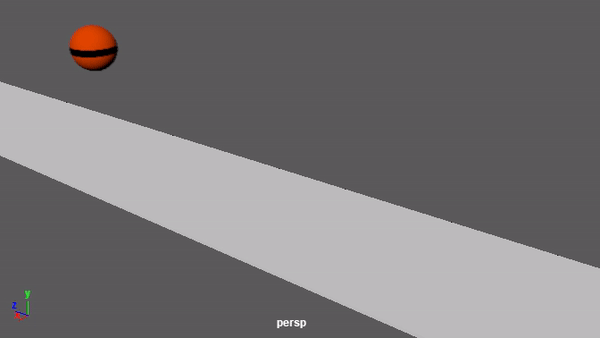
To start with the exercise, a create a new sphere to mimic the ball shape instead of using the bouncing ball template available from the internet as I aimed to start with something small by following the lecturer guidance. Then, I started with keying the key poses and the landing places for the bouncing ball. The onion skin /ghosting feature was turned on to get an instant action preview (I was pretty relying on this function when doing 2D animation in Adobe Animate as it was very helpful for beginners to get the exact animation path right!). Plus, animating in 3D is way more difficult as it's hard to get the natural motion. However, the animating process become better once I had to get used to the process.
"Basketball animation is too fast at the end, slow it down a bit and decrease the landing distance."
"The ping pong ball animation is fine"
"The bowling ball need 1 or 2 more frames to show bouncing/landing at the beginning."
Overall seemed to be a good start, keep on practising observation and exploring!
Bouncing Ball Animation Series (Revised / Version 2) Below are some bouncing ball animation series with some motion adjustments applied based on the feedback given by the lecturer.
Fig 2.1 Basket Ball animation adjustment in Maya
Fig 2.2 Basket Ball (animation after adjustment)
Fig 2.3 Ping Pong Ball animation adjustment in Maya
Fig 2.4 Ping Pong Ball (animation after adjustment)
Fig 2.5 Bowling Ball animation adjustment in Maya
Fig 2.6 Bowling Ball (animation after adjustment)
# Reflection: I am particularly grateful for having Mr Kannan teaching this module this semester. The first day of the class was very inspiring which had sparked my study motivation to the fullest. The reading materials shared by Mr Kannan were very helpful for my understanding of the aesthetics principles as well. On the other hand, I found the Maya interface boring as compared with Blender (as Blender have a better user interface design which makes the tedious animation task way more enjoyable). I observed the bouncing ball animation looked quite fake but I can't tell which motion went wrong and this frustrated me a lot...
(W3 - W5) Ex 2: Acting Series
(Part 1) Walker - Casual Walk The following exercise was to create a walk cycle with the given rigged character template. Students should give the character walkcycle a different persona that could express their personality. For instance, if the character was a happy person, how would it walk? It might be walking with a jumping toe. I wanted the walker character to have a casual personality, and it should be walking at a casual and slow speed. Below were the working process screenshot in Maya.
Fig 3.1 Exploring the character rigs controller in Maya.
Fig 3.3 Checking the walking pose in different perspectives.
Fig 3.4 Adjusting the walking motion in Graph Editor
Fig 3.5 Walker walkcycle (ver.1)
Fig 3.6 Walker walkcycle (ver.2)
Fig 3.7 Walker walkcycle (final)
# Consultation Note:
Walker walkcyle (ver.2): The first attempt was nice but there was a pause on the leg while swinging to the back. Try to make the leg let go a little faster to avoid the pause.
Walker walkcyle (ver.3): This version looked better, and it showed the walking persona well.
# Reflection: I found that animating the walk-cycle in 3D is very fun and challenging as compared with animating in the 2D version. It was a lot easier to offset the movement in Adobe Animate because the software allowed the user to arrange the movement in multiple layers, and there was only one timeline to key in all of the movement in Maya (the thin red lines that indicate different keyframe was confusing and hard to see form far).
(Part 2) Beefy - Confident Walk
Fig 4.0 Opening Beefy model in Maya
Fig 4.1 Animating the Beefy legs
Fig 4.2 Aniamting the Beefy arms
Fig 4.3 Animating the Beefy fingers
Fig 4.4 Beefy walkcycle front view (ver.1)
Fig 4.5 Beefy walkcycle side view (ver.1)
Fig 4.6 Beefy walkcycle perspective view (ver.1)
Fig 4.7 Beefy walkcycle front view (ver.2)
Fig 4.8 Beefy walkcycle side view (ver.2)
Fig 4.9 Beefy walkcycle perspective view (ver.2)
# Consultation Note: (Beefy walk version 2) the movement of the hand is too rigid and jaggy but the leg movement is okay. Should add more rhythm and bounce to the body movement to make it more lively. Make the animation longer so it was more convenient to observe the overall animation better.
# Reflection: I found myself was better at animating the leg move as I had done several practices on the legs walk cycle before. Hence I needed more practice on animating the arms and the body movements with a visual reference. Moreover, It's very hard to animate the character with body and arms as I need to take are a lot of movement at the same time.
(W5 - W6) Ex 4: Car Rig Ctrl (Set Driven Key)
To start with this exercise, I had created a simple toy car and rigged them properly using the parenting function by pressing "p". I proceed to set the driven key by loading the driven and driver objects. I continued to create a base for the toy car and started to animate the car according to the path with the sterling and tyre rotating.
The sequence for rigging by using parenting ("P"):
tyre > tyre rig
tyre rigs > arm
arms > car body
Sterling > sterling rig
Sterling rig + Car body > Car body master rig
# Consultation Note: The car animation looks fine, the rotation of the tyre and sterling could clearly be seen.
# Reflection: I found that rigging was very challenging to master as I needed to have a clear understanding of the rigging sequence and flow.
The completed car rigs
(In animation mode) > Key > Set Driven Key > Set [/]
Load the driver 主驱动 & driven 被驱动
Set the value / moving direction for the driver first
Then set the value / moving direction for the driven
Car rigging part 1: tyre rotation
Car rigging & animation part 1: top view
Car rigging & animation part 2: perspective view
(W7) Ex 5: Expression & Lipsync Acting
In this exercise, students needed to create the expression animation by using the shape blending/ morphing method instead of using the rigs. The lecture mentioned that this method was the easiest and fundamental way to understand the facial expression animation and also to study the topology at the same time. Through this exercise, students would understand how to use blend shape, paint weight and shape editor.
# Consultation Note: -
# Reflection: I personally found that creating facial expressions by using the shape editor was not as convenient as I thought because the blend shape for certain facial parts did not work properly after blending the shape. For example, the mouth might not close properly after blending the shape and editing it in the shape editor... Besides, it was quite confusing that the animation key wouldn't be shown in a red line that indicates the key action if I was using the shape editor to key in the animation...
Expression Exercise Part 1: Create facial expression using the soft selection tool
Modelling Toolkit > Turn on the x-axis symmetry
Press "B" for soft selection (hold B & drag to change the selection area)
The smiling mouth
Expression Exercise Part 2: Create blend shape
Name each model, then select the last to the first / domain model
(In animation mode) Deform > blend shape [/]
Name the blend shape/morph> Apply
A new morph/blend shape controller is created in the channel box
Expression Exercise Part 3: Create blend shape
(Optional) To edit the blend shape controlling weight: Deform > Paint weight (Blend shape)
(In animation mode) Windows > Animation Editor > Shape Editor
The slider can adjust the moving level of each facial parts
Press the key button to key in the animation in the timeline (but the key set is invisible)
Expression animation testing through shape edit
Lipsync & Acting Exercise:
Moving on to the character lipsync and acting exercise, I created and saved the Mel script into the custom shelf for several body parts like the head, spine and limbs. Therefore I could just select certain parts of the model without selecting them one by one. I stared with the mouth expression keying after importing the self-recorded audio. In order to create believable animation, I needed to observe my own facial expression through the mirror from time to time. I then proceed to adjust the movement of the tongue eyebrows, eyelids as well as hand gestures.
# Consultation Note: Showing the lipsync animation without acting)The lipsync looks fine. Ensure there is a proper pause in between the lip movement. Ensure to add on the rest of the facial movement and also the acting as a warm-up practice for the final project.
# Reflection: I found myself starting to get used to the Maya interface after several practices, however, I really hope that Maya could have a better enhancement on the interface design... On the other hand, I found the Mel script very useful in terms of selecting the rigs for keying in the keyframe.
Open script editor > Window > General Editor > Script editor


.jpg)


Comments
Post a Comment